

Is your Viking range or other brand not cooking food well? It might have a problem with the heating element. This happens often, but don’t worry – you can usually fix it yourself quite easily. This guide will help you find out the reasons and show you how to replace a range heating element easily. This way, your appliance will work like new again.
Identifying Signs of a Faulty Heating Element
A faulty heating element can show up in different ways. It often begins with uneven heating. You might see that your food cooks unevenly, with some spots getting more heat than others. Another clear sign is damage to the heating element itself. Check for cracks, blisters, or a darkened, burnt look on its surface.
In some cases, the signs are simpler. If your oven won’t heat up at all or a burner on your stovetop stays cold, the heating element has likely broken. In these situations, replacing it is the best choice.
Preparing for the Replacement Process
Before starting the replacement, make sure your workspace is safe and organized. First, disconnect your appliance from power. You can unplug it if you can. Alternatively, turn off the circuit breaker that controls it.
Next, gather the right tools and materials for the job. Having everything ready will reduce interruptions and help make the installation go smoothly.
Safety First: Disconnecting Your Range
When using any electrical appliance, safety should come first. Begin by finding the power source for your range or oven. If it is plugged into a wall outlet, unplug it carefully. For hardwired appliances, go to your home’s electrical panel and find the circuit breaker that controls your range or oven.
Switch the breaker to the “OFF” position to stop the power completely. To be even more careful, you can use a non-contact voltage tester. This tool will help you check that no electricity is flowing through the wires. This will keep your work area safe while you replace the appliance.
Gathering Necessary Tools and Materials
Having the right tools and materials nearby makes it easier to replace your heating element. Here is a helpful checklist:
- New Heating Element: First, get a new heating element that fits your appliance model. Check your appliance’s manual or search online with the model number to find the right part.
- Screwdriver or Nut Driver: You need this tool to take off the screws that hold the heating element in place.
- Needle-Nose Pliers: These are helpful for unplugging and plugging in the wires connected to the heating element.
With these tools ready, you can avoid delays and make the installation go smoothly.
Step-by-Step Guide to Replacing the Heating Element
Now that you have a safe place to work and the right tools, let’s go through how to replace the heating element step by step. Be careful as you work and check your appliance’s manual for specific instructions for your model.
These steps will help you replace it easily. We want you to have a safe and successful experience.
Step 1: Accessing the Heating Element
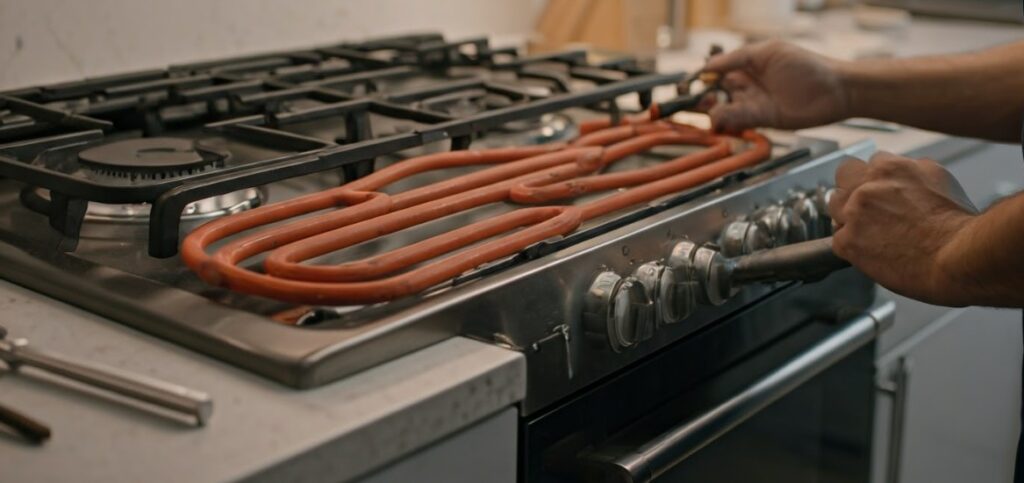
Start by making sure your appliance is cool to touch. Next, find the heating element that is not working. In most ovens, this is at the bottom. For stovetop elements, they are easy to reach on the cooktop surface.
Carefully clear any items that block access to the element. For ovens, you may need to take out oven racks or a bottom drawer. For stovetops, just lift or slide the broken element to reach its connection points.
Be gentle when you handle the element. It could be fragile, especially if it has burned out.
Step 2: Removing the Old Heating Element
Once you have access, carefully take out the old heating element. There are usually a couple of screws that hold a mounting plate in place. Use a screwdriver or a nut driver to loosen these screws.
Then, disconnect the wires connected to the element. Depending on your appliance, these might have slip-on connectors or screw terminals. Take them off gently, and you can use needle-nose pliers if needed. Make sure the wires do not fall back into the appliance.
Lastly, remove the old element by pulling it gently from its housing. Now that the old element is out, you can go ahead and install the new one.
Step 3: Installing the New Heating Element
Align the new heating element with the mounting points in the appliance. Make sure it fits well in its housing. Next, connect the wires to the new element. Match the colors or markings on the element’s terminals with those on the wires.
Secure the mounting plate for the new heating element using the screws you took off before. Tighten them well, but be careful not to over-tighten. This could harm the element or the appliance.
Next, carefully tuck away any extra wiring. This is to stop it from touching the element or any other hot parts inside the appliance.
Step 4: Testing the New Installation
With the new element in place, it’s time to test your work. Turn on the circuit breaker you turned off before or plug the appliance back into the wall. Make sure the control knobs on the appliance are in the “OFF” position before you restore power.
Now, turn on the appliance and choose a low to medium heat setting. Watch the new element closely. It should heat up evenly and glow a steady orange or red color, showing that it’s working properly.
Let the element heat for a few minutes at this setting before turning it off. This warm-up helps set the element correctly. Once it cools down, your appliance will be ready to use.
Contact Viking Repair Pro for Expert Service
While replacing a heating element can be a manageable DIY task, don’t hesitate to seek professional help if you encounter any challenges during the process. That’s where Viking Repair Pro comes in. Our team of experienced technicians specializes in appliance repair, including heating element replacements for all major brands and models. We’re committed to providing prompt and reliable service, ensuring your appliance gets back to peak performance quickly and efficiently.
Conclusion
In conclusion, learning how to replace a range heating element can save you time and money. Following the steps outlined above can help you safely and effectively replace the heating element in your appliance. Remember to always prioritize safety by disconnecting power sources and handling components carefully. If you ever feel unsure or encounter difficulties, don’t hesitate to contact professionals like Viking Repair Pro for expert assistance. For more helpful tips on appliance maintenance and repair, visit our other blogs at our website.
Frequently Asked Questions
Can I replace the heating element without professional help?
Yes, changing a heating element can be an easy DIY task. But if you feel unsure about working with electric devices, it’s best to get help from a skilled technician.
How often should heating elements be replaced?
Heating elements do not come with a fixed replacement schedule. How long they last depends on how often you use them and how well you maintain them. If you see issues, such as uneven heating or damage, think about replacing them quickly.
What should I do if the new element doesn’t work?
If the new heating element is not working, check the wiring connections again. Also, make sure the power supply is on. If it still doesn’t work, get in touch with a qualified appliance repair service for help and troubleshooting.